Intarsia meaning refers to a decorative technique used to create patterns, pictures, and designs from contrasting materials or colors. The term has two main applications: wood intarsia, which uses shaped pieces of wood to form decorative images, and intarsia knitting, which creates distinct blocks of color in knitted fabric. Both techniques turn separate elements into a unified design, but they use different materials, tools, and methods.
In woodworking, artisans combine natural wood grains, shades, and textures to create images that can have a sculptural, three-dimensional appearance. In knitting, crafters use separate balls or bobbins of yarn to make geometric shapes, letters, animals, and other colorful motifs. Understanding intarsia vs. marquetry and intarsia vs. Fair Isle also helps clarify how these techniques differ from related crafts.
Whether you encountered the word in an art history book, a furniture description, a knitting pattern, or a crochet tutorial, this guide explains what intarsia means, where it comes from, how it works, and when to use each technique.
What Does Intarsia Mean?
Intarsia is a decorative art technique that creates a larger design by combining separate pieces or sections of contrasting material. In woodworking, those pieces are shaped and fitted together to form an image or pattern. In knitting, separate yarn supplies create distinct color areas within a single piece of fabric.
The meaning depends on the context. A furniture maker discussing intarsia is probably describing decorative woodwork, while a knitting pattern mentioning intarsia refers to a method of changing colors without carrying long strands across the back of the fabric.
The Two Main Meanings of Intarsia
The word intarsia commonly describes two different crafts.
- Intarsia in woodworking: An artisan cuts and shapes individual pieces of wood, then fits them together to create a decorative image. Differences in wood color, grain, and thickness can add depth and texture.
- Intarsia in knitting: A knitter uses separate yarn supplies for different color sections. The technique works well for large shapes, pictures, letters, and geometric designs.
- The shared principle: Both methods use distinct elements to build a larger composition. Instead of treating color as a simple surface decoration, the craftsperson incorporates it into the structure of the design.
For example, a wooden intarsia panel might depict a bird using light and dark wood. A knitted sweater might show the same bird through separate sections of blue, brown, white, and black yarn.
The materials differ, but the goal remains similar: create a clear, detailed design by arranging contrasting elements precisely.
Where Does the Word Intarsia Come From?
The English word intarsia comes through the Italian word intarsio, which refers to decorative inlay work. Its linguistic roots are associated with inserting or interweaving elements into a larger composition.
The term is especially familiar in discussions of Italian decorative arts, where woodworkers created elaborate pictures and architectural decorations from carefully fitted pieces of wood.
In modern craft terminology, intarsia also has a well-established meaning in knitting. The textile technique uses separate color sections to create designs within knitted fabric.
Although the woodworking and knitting techniques are not the same process, their shared name reflects a common decorative idea: bringing separate elements together to create a larger pattern or image.
Intarsia in Woodworking and Decorative Art
11
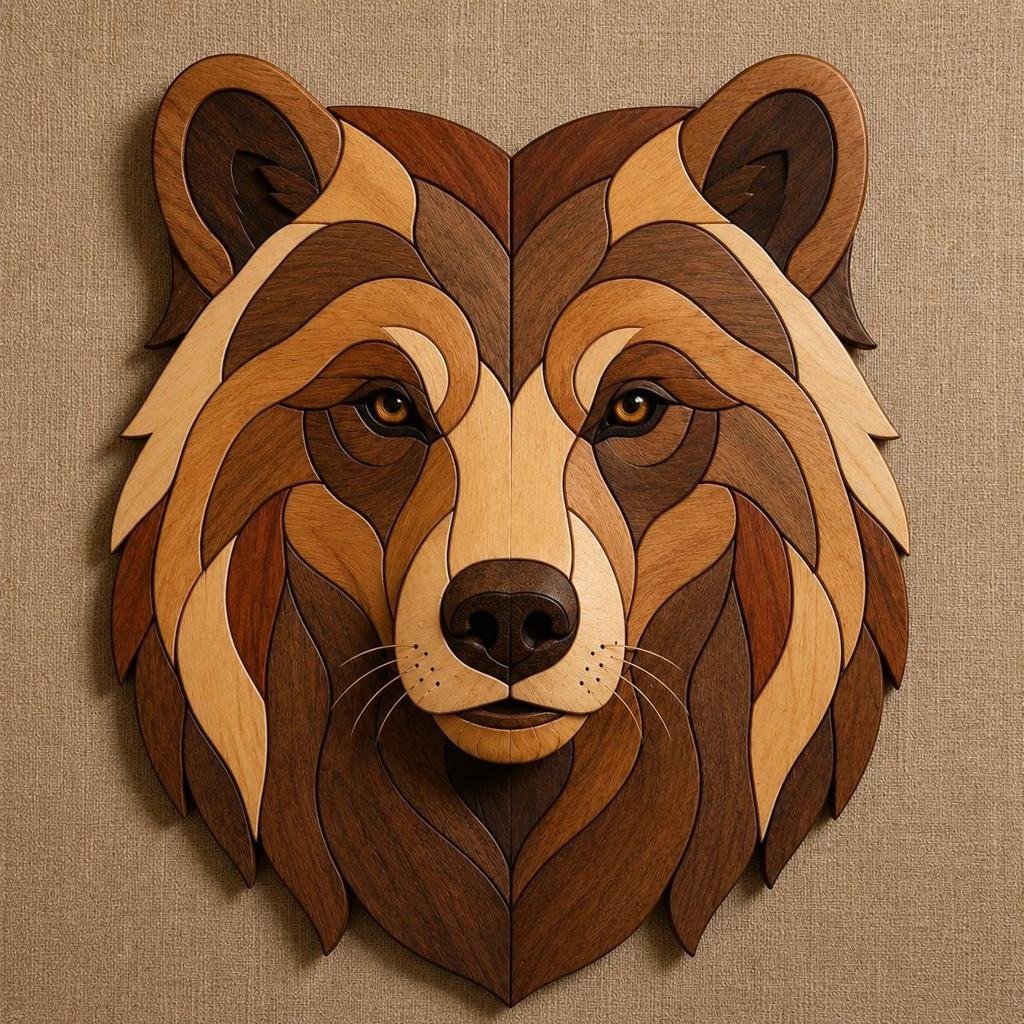
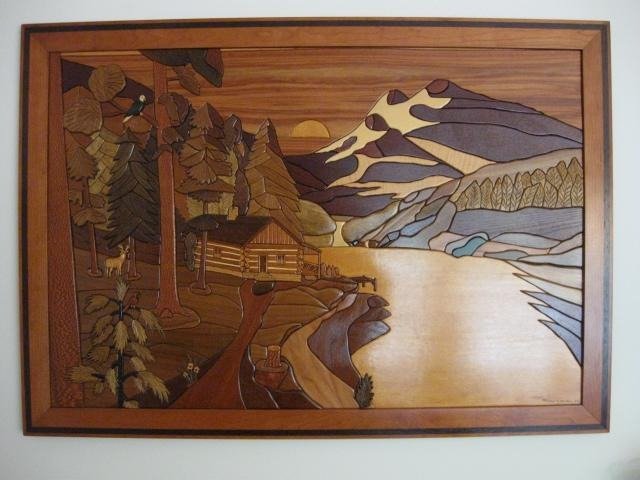
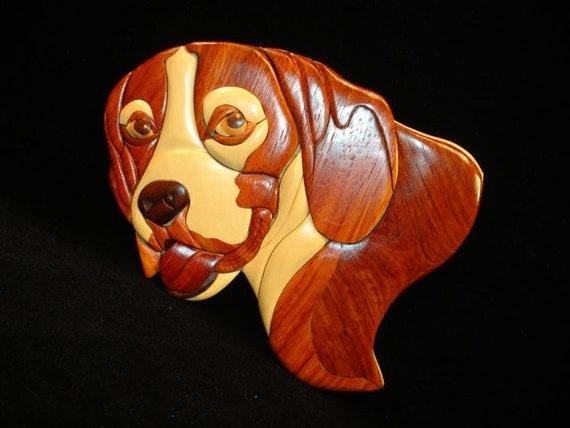
Wood intarsia is a form of decorative woodworking in which individual pieces of wood are cut, shaped, and fitted together to create a picture or pattern. Craftspeople select wood species for their natural colors and grain, then use careful shaping and sanding to produce contrast, texture, and sometimes a raised, sculptural effect.
Unlike a painted image, wood intarsia relies heavily on the physical characteristics of the wood itself. A pale wood can represent a highlight, while a darker species can form a shadow or outline.
How Does Wood Intarsia Work?
Creating a wood intarsia design requires planning, accurate cutting, and careful assembly. Each piece must fit its neighbors while contributing to the overall image.
Here is how the process typically works.
Choose a design. The craftsperson starts with a pattern, drawing, photograph, or original illustration. Beginners often choose a simple animal silhouette, flower, or geometric shape. More experienced makers may work with landscapes, portraits, or complex scenes.
Select the wood. Different wood species offer distinct colors and grain patterns. Basswood, walnut, cherry, maple, and other species may be used depending on the design. The artisan considers not only color but also grain direction, hardness, and how each piece will respond to shaping.
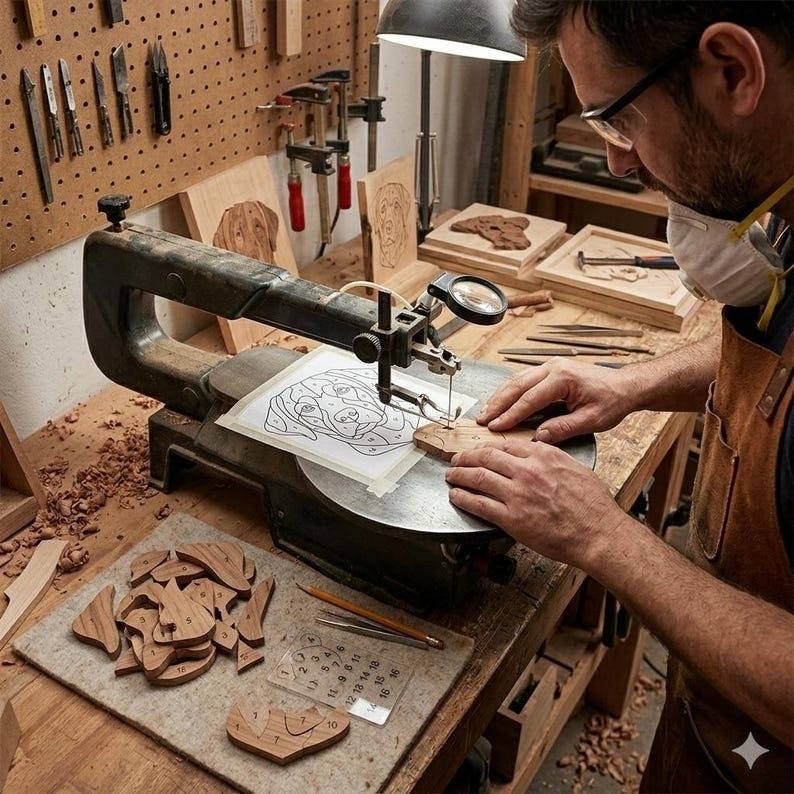
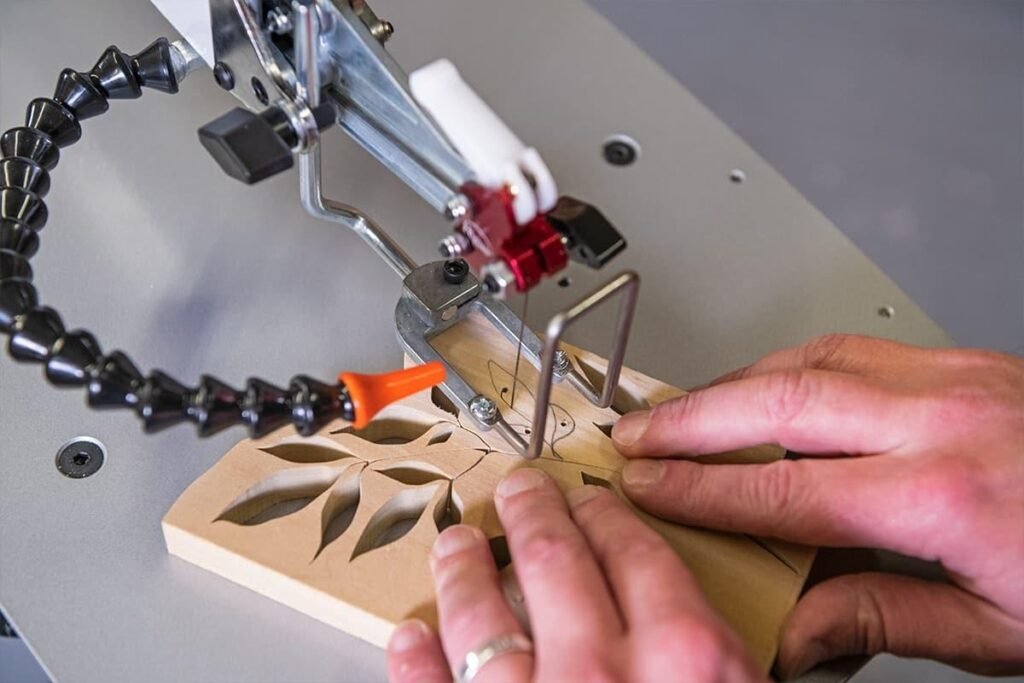
Cut the individual pieces. A scroll saw is commonly used to cut intricate shapes. Each section represents part of the finished image, much like a piece in a jigsaw puzzle.
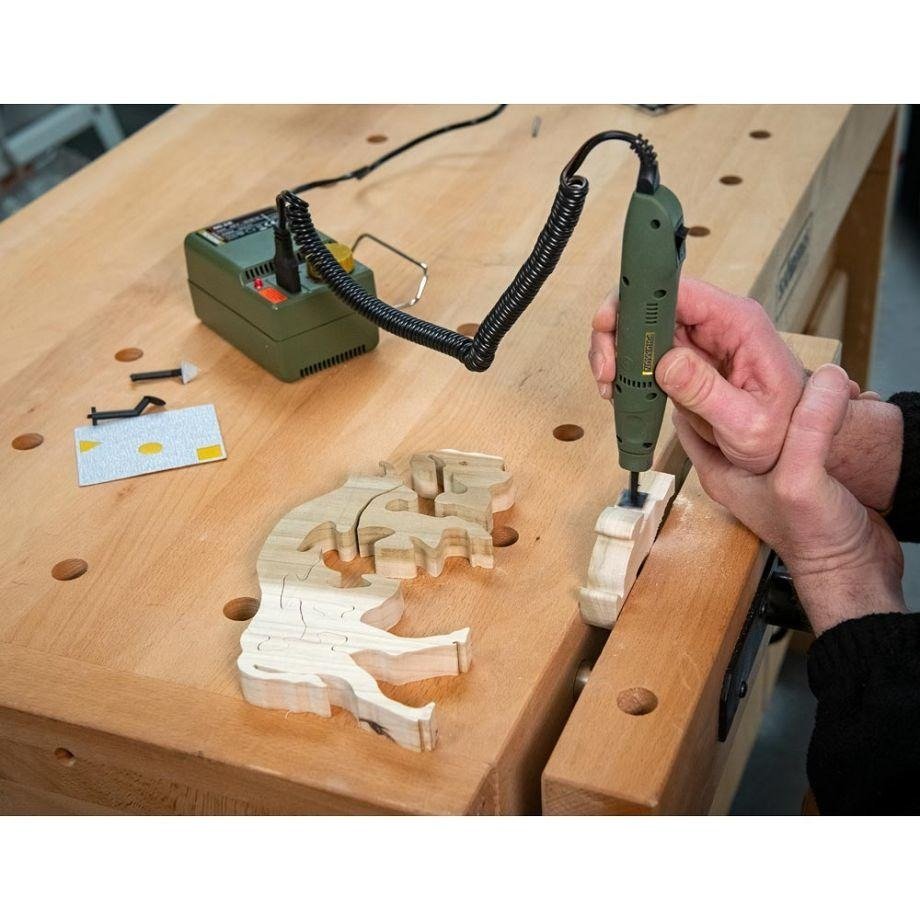
Shape the pieces. The maker sands or carves the edges and surfaces to create curves, contours, highlights, and shadows. A rounded section can suggest an animal’s cheek, while a recessed edge can create the impression of a deeper line.
Fit and assemble the design. The pieces are arranged according to the pattern. The craftsperson checks the fit, adjusts gaps, and glues the components together or attaches them to a suitable backing when the project calls for one.
Finish the surface. Final sanding and an appropriate finish help protect the wood and bring out its grain. The finished piece may have a relatively flat surface or a more pronounced sculptural appearance.
The quality of the result depends on more than precise cutting. Grain direction, tonal contrast, edge shaping, and the relationship between neighboring pieces all influence how easily the viewer can recognize the image.
The History of Intarsia
Decorative wood inlay has a long history, with related techniques appearing in ancient cultures. However, the development of European intarsia is particularly associated with medieval craftsmanship and the Italian Renaissance.
Early Decorative Inlay Traditions
Ancient Egyptian artisans used wood, ivory, and other materials in decorative objects and furniture. Islamic artistic traditions also developed sophisticated geometric and ornamental patterns using wood and other materials.
These practices provide historical context for decorative inlay, although not every early inlay technique should be labeled intarsia in the narrower modern sense.
The broader principle was already well established: artisans could create complex designs by combining materials with contrasting colors, textures, and shapes.
Intarsia During the Italian Renaissance
Intarsia reached particular prominence in Italy during the 15th and 16th centuries. Skilled woodworkers decorated church furnishings, choir stalls, cabinets, doors, and other architectural or household features.
Some Renaissance panels used perspective and tonal contrast to create the illusion of depth. A flat wooden surface might appear to contain a cupboard, a niche, a window, or a collection of objects.
These effects required considerable planning. Artisans had to understand how shapes, shadows, and color relationships could make a two-dimensional panel appear more three-dimensional.
The technique also suited the Renaissance interest in geometry, proportion, architecture, and realistic representation.
Modern Wood Intarsia
Today, wood intarsia appears in handcrafted wall art, decorative signs, animal portraits, landscapes, and personalized gifts. Small workshops and hobbyists use modern saws and sanding tools to create intricate designs that would once have required extensive handwork.
Computer-assisted pattern design can help with layout, but it does not eliminate the need for skilled material selection and shaping. Natural wood varies in grain, color, and density, so each piece still requires practical judgment.
Modern makers often emphasize the character of the material itself. A well-designed project uses wood grain as part of the image rather than treating it as a random background feature.
What Makes Wood Intarsia Unique?
Wood intarsia stands out because the material contributes directly to the finished image.
- Natural color variation: Different wood species offer a range of light, medium, and dark tones without requiring every detail to be painted.
- Grain as a design element: Grain direction can suggest feathers, fur, leaves, flowing water, or other textures.
- Dimensional shaping: Sanding and carving allow some pieces to rise above or recede from adjacent sections.
- Precise construction: Small fitting errors can interrupt outlines or create distracting gaps.
- Individual character: Even when two artisans use the same pattern, their choice of wood and shaping decisions can produce different results.
Consider an intarsia owl. A maker might use pale maple around the eyes, walnut for the pupils and darker feathers, and a warm reddish wood for the body. Curved grain can reinforce the feather pattern, while carefully sanded edges make the face appear rounded.
The image comes from the combined effect of color, grain, shape, and light, not color alone.
What Tools Are Used to Make Wood Intarsia?
9
A wood intarsia project can require several tools, depending on its size and complexity.
| Tool or material | Main purpose |
| Scroll saw | Cuts intricate curves and small shapes |
| Coping saw or fine hand saw | Makes selected cuts without powered equipment |
| Sanding tools | Shape edges, smooth surfaces, and create contours |
| Carving tools | Add fine details or deeper sculptural features |
| Wood glue | Bonds pieces during assembly |
| Clamps | Hold components securely while glue cures |
| Pattern and pencil | Guide the layout and cutting process |
| Suitable wood stock | Supplies the contrasting colors and grain |
| Protective finish | Helps protect the completed artwork |
Beginners do not need every specialized tool at once. A small project with a manageable number of pieces can teach the basics of cutting, fitting, and sanding.
Safety matters: Wear suitable eye protection, control dust with effective extraction or other appropriate precautions, and follow the tool manufacturer’s operating instructions. Fine wood dust can irritate the respiratory system, while scroll saws and carving tools can cause injuries when handled carelessly.
Marquetry vs. Intarsia: What’s the Difference?
Intarsia and marquetry are both decorative woodworking techniques, but they differ in how artisans prepare and assemble the materials. Intarsia often uses shaped pieces of solid wood to create dimensional images, while marquetry typically arranges thin wood veneers into decorative pictures or patterns on a supporting surface.
The distinction matters when you examine antique furniture, compare woodworking methods, or choose a technique for a new project. Both methods can produce detailed images, but their construction and finished appearance often differ.
Key Differences Between Intarsia and Marquetry
| Feature | Intarsia | Marquetry |
| Materials | Commonly shaped pieces of solid wood | Typically thin wood veneers |
| Construction | Pieces are shaped and fitted together | Veneer pieces are assembled into a composition and applied to a substrate |
| Surface appearance | Often sculptural or dimensional | Usually flat and flush |
| Visual effect | Emphasizes contours, depth, and natural wood character | Emphasizes intricate surface patterns and fine details |
| Common applications | Wall art, animal portraits, decorative panels | Cabinets, tabletops, doors, boxes, and furniture |
| Main challenge | Shaping pieces and fitting their edges accurately | Cutting delicate veneers and aligning fine details |
| Material thickness | Pieces can have substantial thickness | Veneers are thin sheets of wood, often less than 1/16 inch thick |
These differences describe typical examples rather than strict rules for every historical or modern object. Some projects combine methods, and terminology can vary between workshops and periods.
For example, an artisan creating a wooden eagle might use intarsia to shape individual feathers so that they rise from the surface. Another artisan might use marquetry to assemble thin veneers into a detailed eagle image on a cabinet door.
Both approaches depend on careful design and material selection. The key difference lies in how the pieces form the finished surface.
Can Intarsia and Marquetry Be Used Together?
Yes. A furniture maker can combine marquetry with dimensional woodwork to create a more complex decorative object.
Imagine a cabinet featuring a flat marquetry landscape on its doors and raised intarsia details around the frame. The veneer image provides fine visual detail, while the shaped wood elements introduce texture and depth.
Craftspeople may combine techniques when a single method cannot deliver every desired effect. They might use:
- Marquetry for detailed backgrounds, buildings, or decorative borders.
- Intarsia for raised flowers, animal features, or sculptural focal points.
- Carving for additional texture and relief.
- Traditional inlay for narrow lines or decorative accents.
Historical terminology can overlap, so the label alone does not always tell you how an object was made. When examining a piece, look at its construction, material thickness, and surface contours.
Intarsia in Knitting and Textile Crafts
11
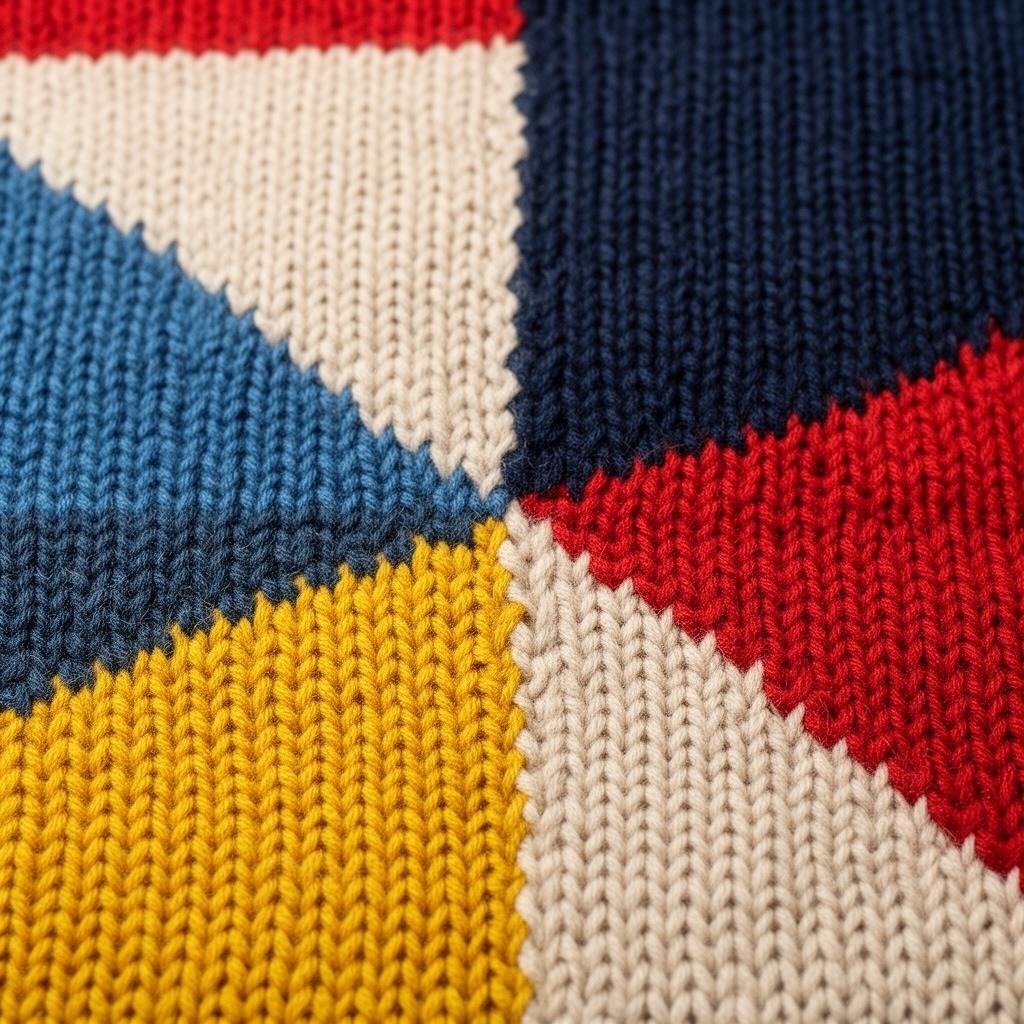
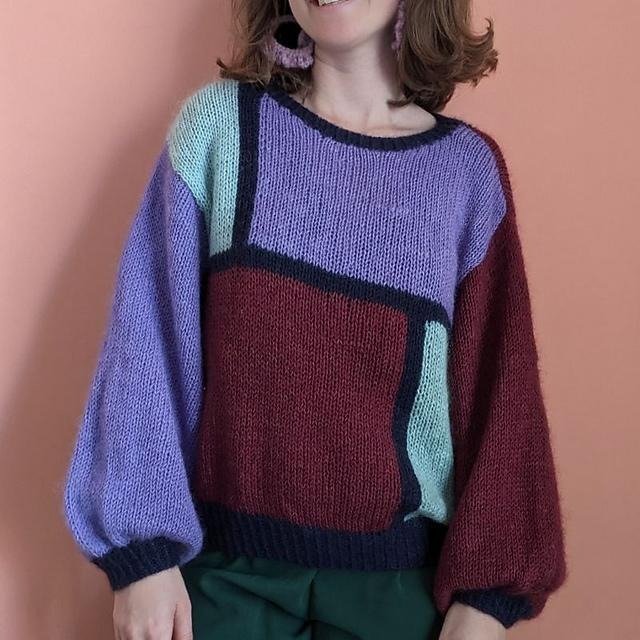
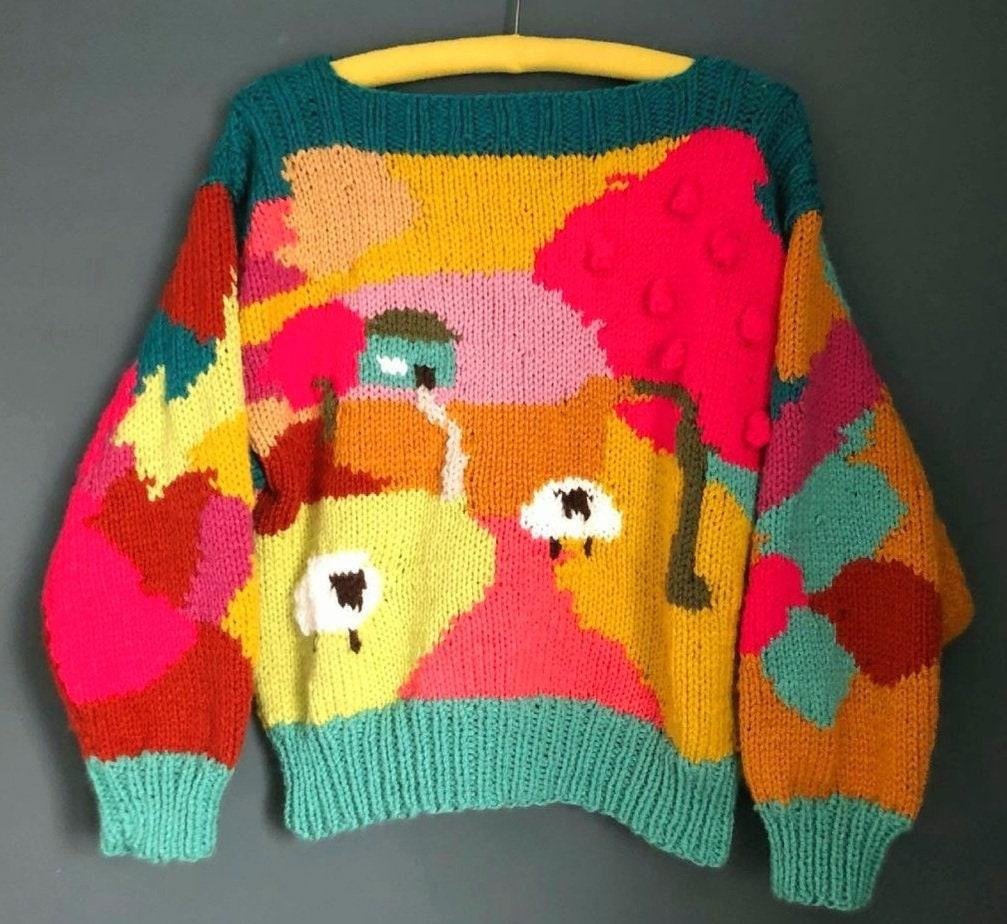
Intarsia knitting is a colorwork technique that creates separate blocks of color within knitted fabric. Instead of carrying one unused yarn across the back of the work, knitters generally use a separate ball, bobbin, or yarn supply for each color area. This approach makes intarsia suitable for large shapes, letters, pictures, and bold geometric patterns.
You might see intarsia on a sweater with a large heart on the front, a cardigan featuring contrasting panels, or a blanket with a series of colorful shapes.
Unlike printed fabric, the design becomes part of the knitted structure. The color changes occur as the knitter forms the stitches.
How Does Intarsia Knitting Work?
The basic method is straightforward, but successful intarsia depends on managing yarn supplies and controlling tension at color changes.
Plan the Color Sections
Start with a chart or pattern that shows where each color begins and ends. A simple design might contain a large red square on a white background.
A more complicated design could include several colors within one row. Each separate color area needs its own yarn supply, even when two areas use the same color with another color between them.
For example, a white sweater with two separate blue shapes may require two blue yarn supplies. One strand cannot simply travel behind the intervening white section without creating a float.
Prepare Separate Yarn Supplies
Knitters often wind yarn into small bobbins or use miniature balls for individual color sections. Each supply should contain enough yarn for its section without creating unnecessary tangles.
The number of supplies depends on the pattern. A design with three large color areas may need only a few bobbins, while a picture with many small sections can require considerably more.
Organizing the yarn before starting helps prevent knots and makes color changes easier to manage.
Change Colors Without Leaving Holes
When a new color begins, the knitter brings the new yarn into the work. At the boundary between two colors, the yarns are typically wrapped around each other so that the strands interlock.
This step matters because simply switching from one strand to another can leave a gap in the fabric.
A practical approach is to bring the new strand from underneath or around the old strand, following the pattern’s technique. The exact movement depends on whether you are knitting on the right side or wrong side and on the method you use.
The goal is to connect adjacent color sections without pulling the fabric too tightly. A loose join may leave holes, while excessive tension can pucker the fabric or distort the design.
Manage the Yarn on the Wrong Side
Intarsia generally avoids long floats across the back of the fabric, but it does not eliminate yarn management.
Each color section creates yarn ends that must be handled neatly. Some knitters weave in the ends after completing the piece; others use suitable joining or finishing methods as they work.
For a clean result:
- Keep bobbins separated and untangled.
- Avoid pulling too hard at color boundaries.
- Check the wrong side periodically.
- Weave in ends securely without creating bulky areas.
- Block the finished piece according to the yarn’s care requirements.
Blocking can improve the appearance of the fabric and help even out stitches, but it will not repair every poorly managed color change.
What Can You Make With Intarsia Knitting?
Intarsia works particularly well when a design includes large areas of color rather than tiny repeating motifs.
Common projects include:
- Sweaters and cardigans: Add hearts, stars, initials, logos, or large geometric panels.
- Blankets: Create checkerboards, abstract designs, or simple picture motifs.
- Scarves: Add contrasting blocks or a central decorative image.
- Home accessories: Make cushions and decorative panels with bold color arrangements.
- Children’s clothing: Knit animals, vehicles, letters, and playful shapes.
- Statement garments: Use asymmetrical color blocking to create a modern design.
The technique also allows a designer to place colors precisely. For example, a sweater can feature a large yellow sun against a blue background without carrying yellow yarn across the entire back of the sun’s surrounding area.
However, intarsia is not automatically the best option for every multicolored project. If the design repeats small motifs across many stitches, stranded colorwork may be easier to manage.
Is Intarsia Knitting Suitable for Beginners?
Yes. Intarsia is accessible to beginners who already understand basic knitting stitches, although managing several yarn supplies can take practice.
The main challenge is not the number of stitches. It is keeping the color boundaries neat while maintaining consistent tension.
A useful beginner project might feature a single contrasting square on a plain background. This teaches the core skills without requiring the knitter to manage a complicated picture.
Try this progression:
- Knit a small swatch using two colors.
- Practice changing colors at a clearly marked boundary.
- Learn how to wrap the yarns to connect adjacent sections.
- Add a second color block and practice organizing multiple bobbins.
- Move on to a simple picture or letter once your edges look consistent.
Beginners should watch for three common problems.
Holes at color changes: These often occur when the strands do not interlock correctly. Review the joining method and avoid stretching the stitches at the boundary.
Uneven tension: Pulling each yarn supply too tightly can cause the fabric to pucker. Let the stitches lie naturally on the needle.
Tangled bobbins: Too many loose yarn supplies can turn a simple pattern into a frustrating project. Wind manageable amounts and untwist the bobbins when needed.
A little practice can make intarsia much easier. Once you understand how to connect adjacent color sections, you can apply the same principle to many different designs.
Intarsia vs. Fair Isle Knitting
Intarsia generally uses separate yarn supplies for individual color blocks, while Fair Isle traditionally carries strands across the back of the fabric to form repeating patterns.
Although both techniques introduce contrasting colors into knitted fabric, their construction affects the fabric’s appearance, flexibility, and back side.
Intarsia vs. Fair Isle: Key Differences
| Feature | Intarsia | Fair Isle |
| Pattern style | Large, distinct color areas | Repeating geometric motifs and bands |
| Yarn management | Separate yarn supplies for individual sections | Unused strands carried across the back |
| Back of fabric | Usually lacks long floats between separate blocks | Contains floats behind stitches |
| Typical designs | Pictures, letters, large shapes, color blocking | Repeating patterns with contrasting colors |
| Main challenge | Managing separate yarn supplies and joins | Maintaining even tension and managing floats |
| Fabric considerations | Often suitable for relatively large color areas | Floats can affect stretch if pulled too tightly |
| Common uses | Graphic sweaters and picture motifs | Patterned sweaters, hats, mittens, and accessories |
Fair Isle is a specific tradition of stranded colorwork associated with Fair Isle in Scotland. The term is also often used more broadly in everyday knitting discussions, although not every stranded pattern is technically a traditional Fair Isle design.
When Should You Choose Intarsia Instead of Fair Isle?
Choose the technique that matches your pattern’s structure.
Use intarsia when:
- You want a large picture on a sweater.
- The design includes letters, numbers, or a logo.
- Different colors occupy separate sections.
- You want to avoid long floats behind large blocks of color.
Use Fair Isle or other stranded colorwork when:
- The pattern repeats across a row or round.
- Small motifs appear in regular bands.
- Two or more colors alternate frequently.
- Carrying the unused yarn creates a practical construction method.
Consider a sweater with a large red apple centered on the front. Intarsia lets you create the apple as a separate color area, with green or brown sections where needed. Stranded colorwork would be less convenient if the design required carrying red yarn across a broad white background.
Now imagine a sweater covered in small red diamonds against a cream background. A stranded method can be practical because the colors alternate repeatedly across the row.
Neither technique is universally superior. The pattern determines which method is more efficient and produces the intended fabric.
Intarsia in Crochet: Is It Possible?
11
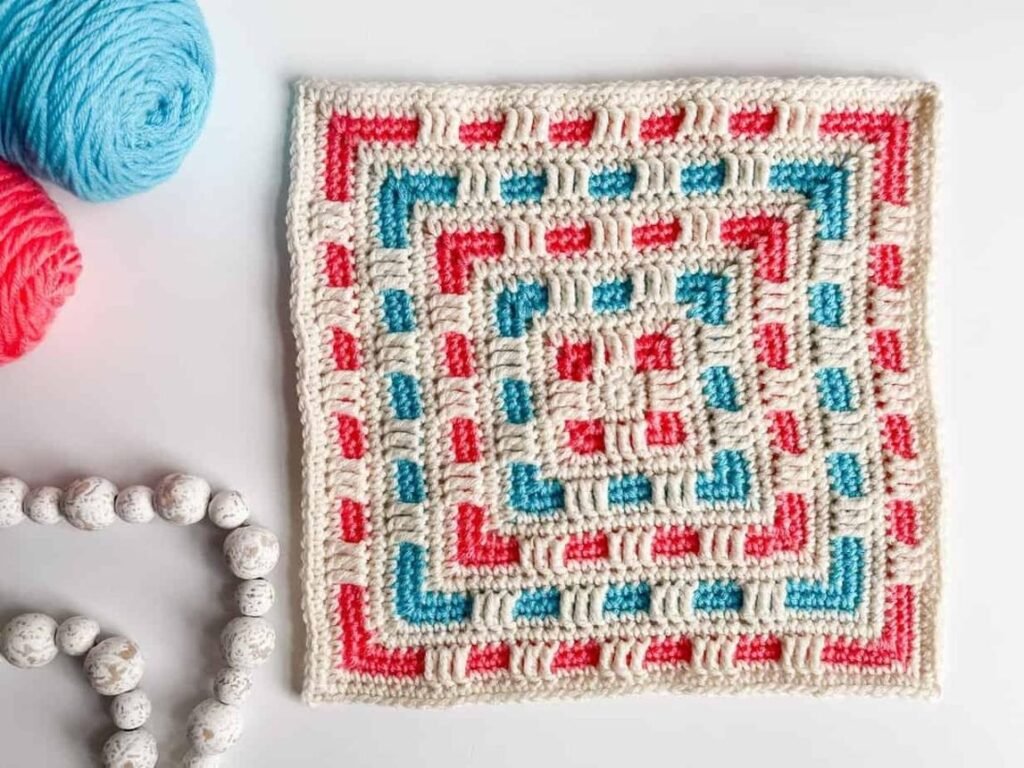
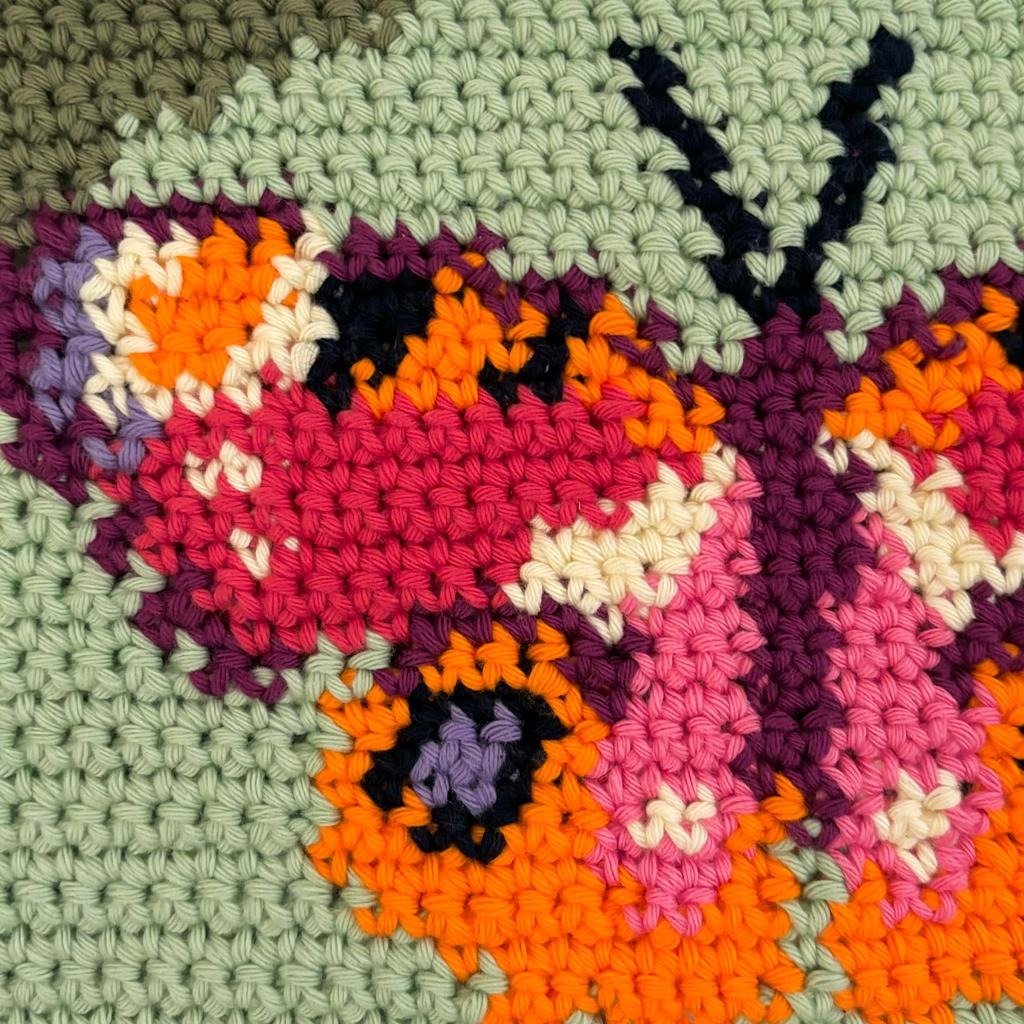
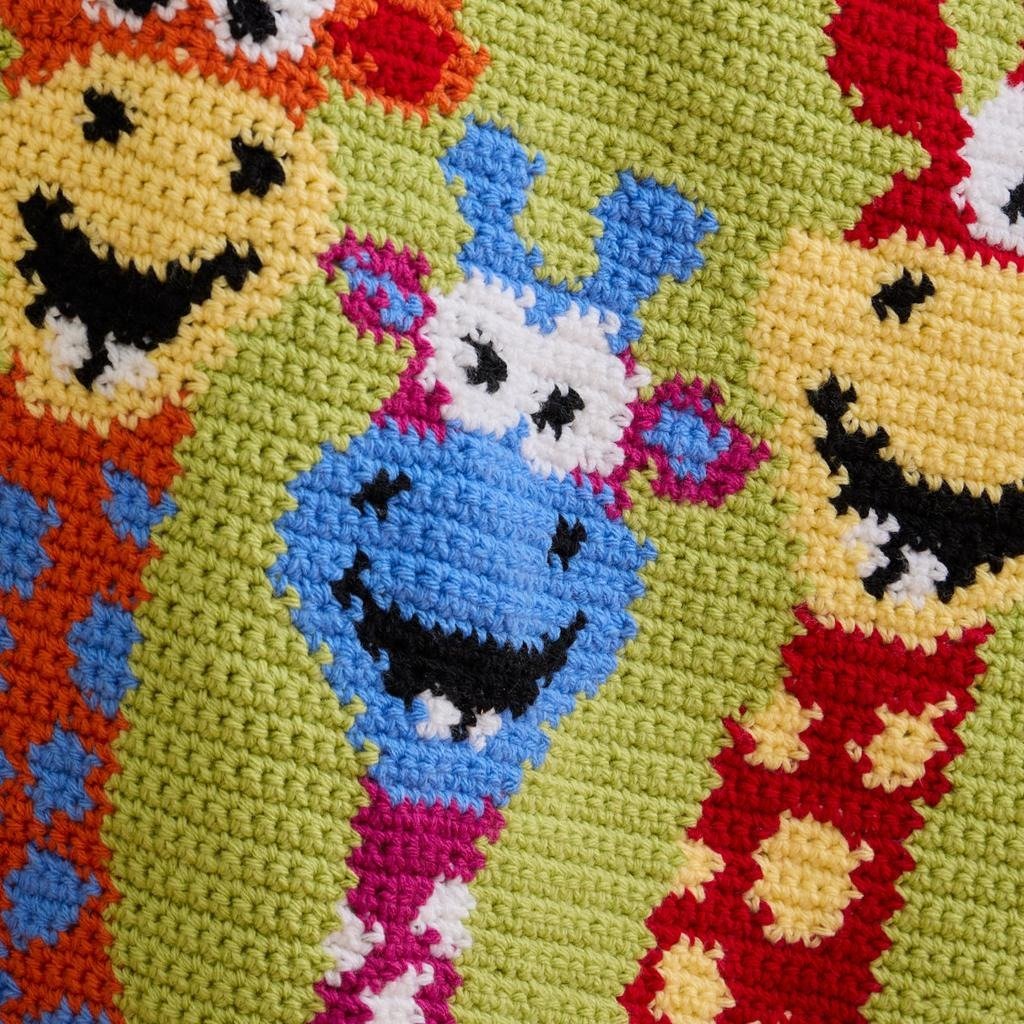
Yes, you can use intarsia in crochet to create distinct blocks of color within a project. The method uses separate yarn supplies for different color areas, making it useful for pictures, geometric shapes, letters, and decorative panels. Tapestry crochet offers a related approach, but it often carries unused yarn inside the stitches.
Crochet intarsia can be useful when you want a large motif without carrying every unused color across the entire row. However, the best method depends on the design, stitch pattern, and how you want the finished fabric to look.
Intarsia Crochet vs. Tapestry Crochet
These techniques both produce multicolored crochet, but they manage yarn differently.
| Feature | Intarsia Crochet | Tapestry Crochet |
| Yarn supply | Usually uses separate supplies for distinct color areas | Often works with multiple colors, including yarn carried within stitches |
| Color changes | Occur at boundaries between separate sections | Occur as the pattern changes from stitch to stitch |
| Unused yarn | Generally not carried through large, separate color areas | Commonly carried inside or along the stitches |
| Best for | Large pictures, isolated shapes, and broad color blocks | Repeating motifs, geometric patterns, and dense designs |
| Main challenge | Managing separate yarn supplies and clean joins | Controlling tension and concealing carried yarn |
The terms can overlap in modern crochet patterns. Some designers use hybrid methods, so it is worth checking the pattern instructions instead of relying on the technique’s name alone.
For example, a cushion featuring a large blue circle on a white background may suit intarsia crochet. A small checkerboard pattern repeated across the cushion may be easier to create with tapestry crochet.
Tips for Trying Intarsia Crochet
If you are new to the technique, start with a simple design containing two colors and a clearly defined boundary.
- Choose a simple chart: A square, rectangle, or basic heart makes color placement easier to follow.
- Prepare separate yarn supplies: Wind small balls or bobbins for each color section.
- Practice color changes: Follow the pattern’s instructions for changing yarn and securing the join.
- Keep your tension consistent: Tight stitches can distort the shape, while loose stitches may leave gaps.
- Manage yarn ends carefully: Secure the ends to reduce the risk of unraveling and keep the finished piece tidy.
- Check both sides: Look for gaps, bulky joins, and visible carried yarn as you work.
Crochet intarsia is especially useful for graphic designs because it lets you control the location of each color. Once you understand the basic process, you can experiment with more complicated motifs.
Frequently Asked Questions About Intarsia
What Does Intarsia Mean in Simple Terms?
Intarsia is a decorative technique that combines separate pieces or color sections to create a larger design. In woodworking, artisans fit shaped pieces of wood together to make pictures or patterns. In knitting, crafters use separate yarn supplies to create distinct blocks of color within fabric.
The word can therefore describe different crafts, depending on the context. A decorative wooden panel and a knitted sweater may both feature intarsia, even though their materials and construction methods differ.
Is Intarsia Hard for Beginners?
Intarsia can be learned by beginners, but the difficulty depends on the craft. Wood intarsia requires accurate cutting, shaping, and fitting, while knitting intarsia requires consistent tension and careful yarn management.
For woodworkers, a small pattern with a few pieces provides a good starting point. For knitters, a simple two-color square helps build confidence with color changes.
Start with a manageable project and focus on precision before attempting detailed designs.
What Tools Are Needed for Wood Intarsia?
The main tools for wood intarsia include a scroll saw, sanding tools, wood glue, clamps, and suitable wood stock. Carving tools can help create additional contours and fine details.
A scroll saw cuts the individual shapes, while sanding tools refine their edges and surfaces. Glue holds the pieces together, and clamps help maintain contact while the adhesive cures.
You can begin with a small project and basic equipment rather than investing in every specialized tool immediately. Always use appropriate eye protection and dust-control measures.
Can You Do Intarsia in Crochet?
Yes. Intarsia crochet creates separate blocks of color by using individual yarn supplies for different sections. It works well for large motifs, letters, and geometric designs.
Tapestry crochet is a related technique that often carries unused yarn within the stitches. Intarsia can be more practical when a color occupies a large, isolated area because it avoids carrying that strand through the entire section.
Some projects combine elements of both methods.
What Is the Difference Between Intarsia and Marquetry?
Intarsia commonly uses shaped pieces of solid wood to build a decorative image, often with dimensional contours. Marquetry typically uses thin wood veneers arranged into a pattern and applied to a supporting surface.
Intarsia often emphasizes sculptural depth, while marquetry commonly produces a flat, detailed composition. Both techniques rely on careful material selection and precise fitting.
The distinction is not absolute in every historical example, and some decorative objects combine multiple woodworking methods.
What Is the Difference Between Intarsia and Fair Isle?
Intarsia creates separate color blocks using individual yarn supplies, while Fair Isle traditionally uses stranded colorwork to create repeating patterns. In Fair Isle knitting, unused yarn travels across the back of the fabric as floats. Intarsia generally avoids long floats between isolated color areas.
Choose intarsia for large pictures, letters, and broad shapes. Choose Fair Isle or another stranded technique for repeating motifs and patterned bands.
Conclusion: Understanding the Meaning of Intarsia
The meaning of intarsia depends on whether you are discussing decorative woodworking or textile crafts. In woodworking, intarsia brings shaped pieces of wood together to create pictures, patterns, and dimensional artwork. In knitting, it creates separate blocks of color by using individual yarn supplies within a knitted fabric.
Both techniques reward careful planning and attention to detail. Woodworkers must consider grain, color, shape, and fit, while knitters must manage yarn supplies, color changes, and tension. Understanding intarsia vs. marquetry and intarsia vs. Fair Isle makes it easier to recognize each method and choose the right one for a project.
If you want to try intarsia yourself, start small. Make a simple wooden design with a few pieces or knit a two-color motif. Once you understand how the separate elements fit together, you can move on to more intricate pictures and patterns.
Ready to explore more craft and vocabulary terms? Learn the differences between related techniques, practice with a beginner-friendly project, and use the right terminology to describe what you create.